Creating and Placing Symbols in Grid
Function creates ceiling grid in rooms and fits luminaires into it and places into existing ceiling grids in floorplans.
-
Select
 (Place Ceiling Grid). Click data point and reset inside a room shape.
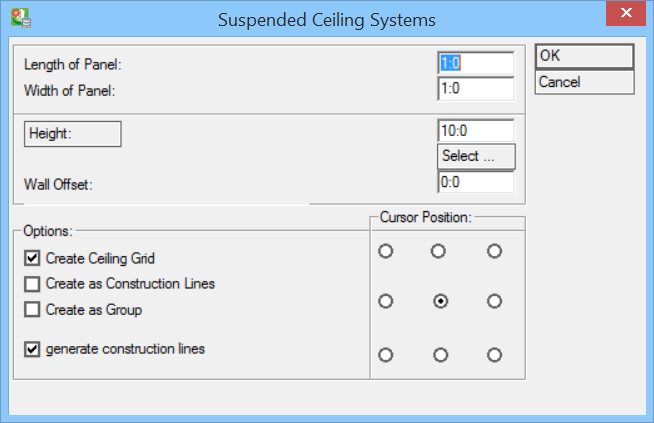
The Suspended Ceiling System dialog opens.
(Place Ceiling Grid). Click data point and reset inside a room shape.
The Suspended Ceiling System dialog opens.
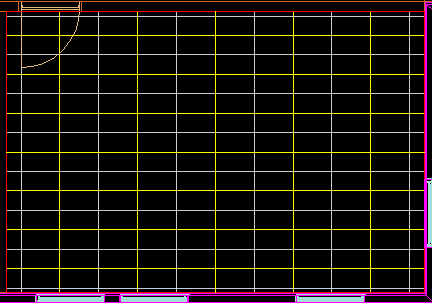
- Check the panel settings and click OK. Place Panel in room center. Ceiling Grid and Construction Lines are automatically generated.
- Select Construction Lines with Power Selector. Symbols are placed at intersections of selected construction lines.
-
Select
 (Place in Grid) tool.
The Place Symbols in Grid dialog opens.
(Place in Grid) tool.
The Place Symbols in Grid dialog opens.
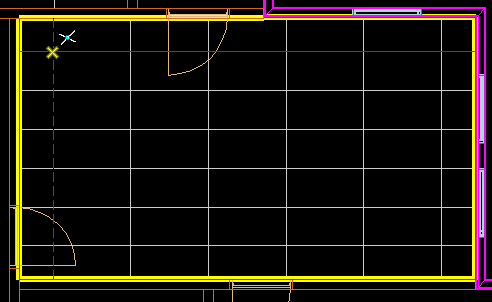
- Select base point room: upper left corner. This is where the grid starts in the room. All 4 corners of a room are selectable.
- Select base point symbol: upper left corner. This defines the insertion point for the symbols in grid. It is also possible to select the cell base point as the insertion point.
- Offsets: type in X and Y offset from the room base point for the first symbol manually. Alternatively, click Pick Point and a data point in the drawing. Reset will bring you back to the Place Symbols in Grid dialog.
- Enter the number of symbols for X and Y directions, or check Max to fill in the maximum number of symbols possible for the room.
- Enter Height for symbols; all symbols in grid will be placed on this height.
- Click Select.. and select a symbol in Symbol Manager dialog.
- Use Angle to rotate symbols.
- Click >Preview to have a look at the symbol arrangement in grid before placing in drawing. Reset will bring back the dialog.
- Click Place Symbols to place symbols in drawing.
- Click on upper left corner of panel for insertion point of first luminaire symbol (after clicking Pick Point in the Offset section).
-
Click reset, the dialog reappears, X and Y Offsets are picked from clicking data point in the drawing.
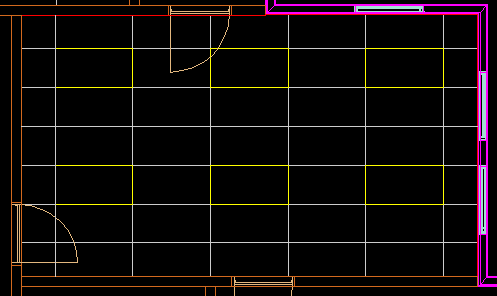
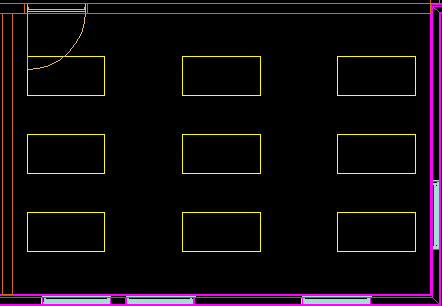
The symbols get placed in grid at set offsets.
Tip: To get rid of the Construction Lines, multi select lines and hide them using the
 (Hide Construction Lines) or remove permanently using the
  (Delete Construction Lines) tool.


Each symbol can be edited individually.
To change the height of symbols that are already placed in drawing, use the ![]() (Modify Symbol Height).
(Modify Symbol Height).
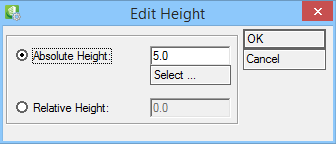
Select symbol(s) in drawing and then enter new height.